Filters
Table of contents
- What is a filter
- Filters and the timeline
- How to create a filter
- Using multiple filters
- Types and comparison modes
- Advanced filter usage
- Importing and exporting filters
What is a filter
Filters are one of the best tools available in Frame by Frame to find data in large recordings. As the name indicates, they filter properties and events. The frames where that filter passes are highlighted in the timeline.
Filters are divided into:
- Event filters
- Property filters
The first one can filter events based on its name, tag or even specific properties. For example, let’s say the recording contains “Damage Received” events with properties indicating the source of the damage, the type and the amount. You could create an event filtering detecting all events with the name “Damage Recevied” that have a property called “amount” higher than 20.
Property events are similar, except they filter properties, not events. Filtering properties works the same way as filtering event properties. In this filter it is also possible ot specify the property group. The filter will then find properties that are part of that specific group.
Filters and the timeline
By default, Frame by Frame will display all events in the timeline as small dots. The reason is simply that usually, you will be looking for events when looking at a recording. This behaviour is somewhat equivalent to creating a filter that filters all events.
If some of the events are from the currently selected entity, the timeline highlight them. This is a quick way of figuring out if the current entity has any events, and where.

The moment a filter is created, the default view of all events is gone, and the timeline only shows the active filters. The same highlighting behaviour works with filters. The timeline highlights filters that match the current selected entity.
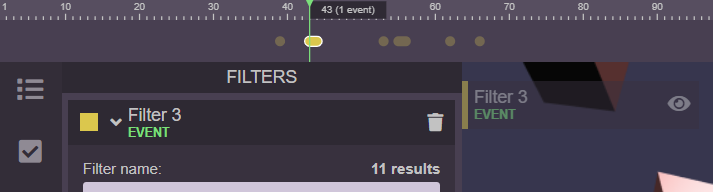
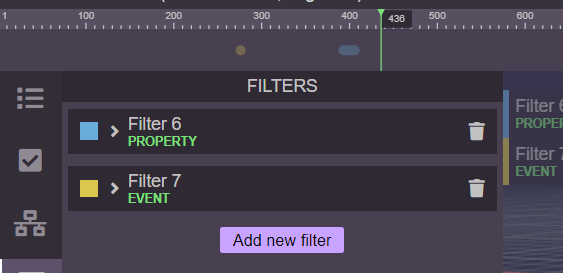
You can create multiple filters, and each one of them will be automatically assigned a different color. The timeline displays all filtered frames with their corresponding color.
When you create a new filter, a Filter Ticker will apear on the left side of the viewer, showing the name of the filter and its color. You can also click on the eye icon on the ticker to hide or show the filter on the timeline.

How to create a filter
There are two ways of creating filters in Frame by Frame.
Create an empty filter and fill it
In order to create a filter first navigate to the filter panel in the left side bar. Then, hover over the Add New Filter dropdown. Then, select the type of filter you want to create.
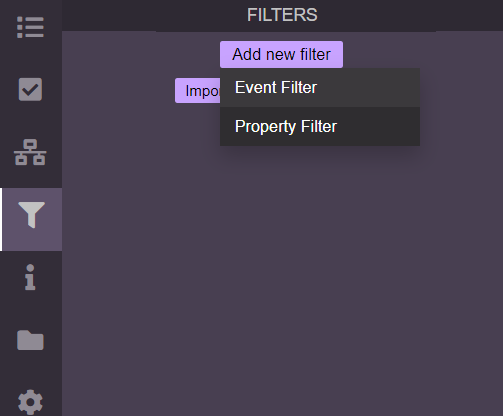
This will create an empty new filter. You can now manually fill the fields to decide what you want to filter.
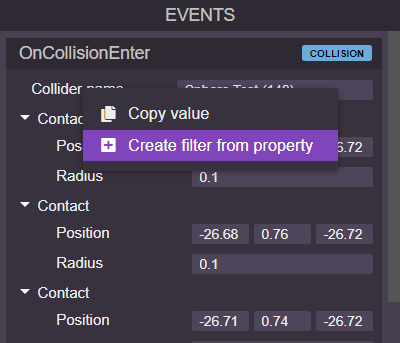
Create an filter from a property or event
You can create pre-filled filters from an already existing property or event. This is a convenient way of quickly making a filter for something you already have opened. For instance, this option is useful when you already found an event, and want to filter for the same or similar events. You can create a filter from that event, and modify just a few fields.
In order to do this, right click on an existing propery or event, and click on Create filter from property or Create filter from event
Using multiple filters
You can create multiple filters at the same time. Each one of them will be represented with a different color in the timeline.
Types and comparison modes
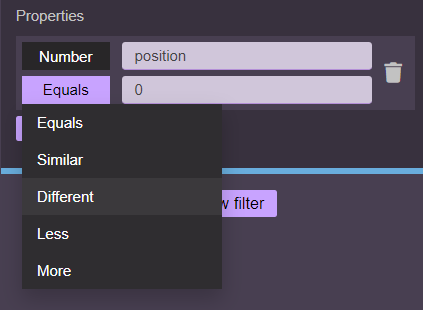
When filtering properties, you will need to select the type of the property you want to filter, as well as the comparison mode.
To change the type or the mode, hover over the currently selected one and a dropdown should appear with all available options. Keep in mind that the available modes depend of the type. Some modes are unique to certain types. For example, the less and more modes can be used for numbers, but not for strings.
The available types are:
- Number: use for any numerical data, including complex types like vectors. LEarn how to further filter these types in the advanced filter usage section.
- String: any text data.
- Boolean: these values can only be
trueorfalse.
The comparison modes are:
- Equal
- Different
- Similar (numbers only)
- More (numbers only)
- Less (numbers only)
- Contains (strings only)
Advanced filter usage
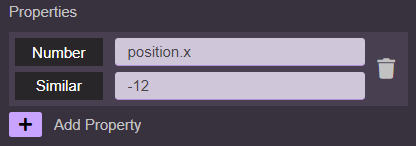
When filtering complex data types, like vectors, you can filter individual components of the type.
In the case of a vector with 3 components, you can write the name of the property and add .x, .y or .z to filter an specific component.
If you don’t specify a component, the vector will filter all components, any component matching the value will pass the filter.
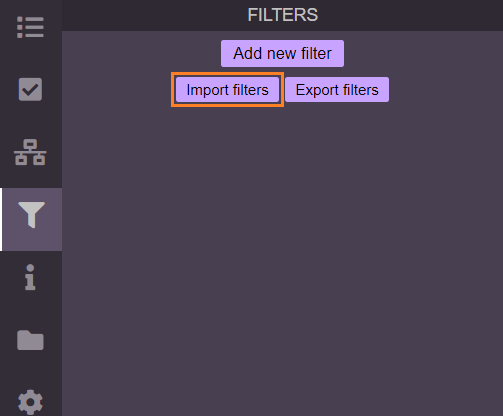
Importing and exporting filters
It is possible to export your current filters, as well as import any previously exported ones.
To export your current filters, click on the Export Filters button. This will open a dialog that will let you choose the location to save your filters. The extensions of stored filters is .fbff.
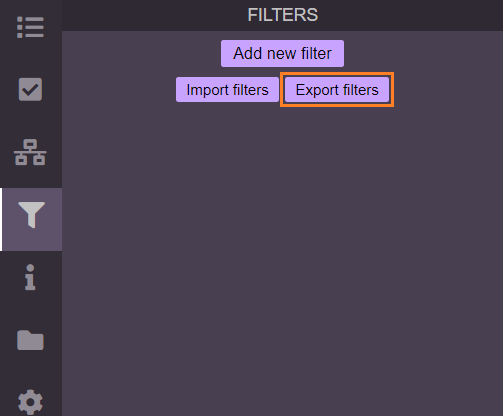
To import filters, click on the Import Filters button. This will open a dialog that lets you choose which filters to import. Select the filters and confirm the dialog, and you should see the new filters showing up in the filters window.