User Interface
Table of contents
- Overview
- Welcome Screen
- Title Bar
- Playback Bar
- Timeline
- 3D viewer
- Entity List
- Entity Data
- Console
- Recording Options
- Connections
- Filters
- Recording Info
- Recent Files
- Settings
Overview
Welcome Screen
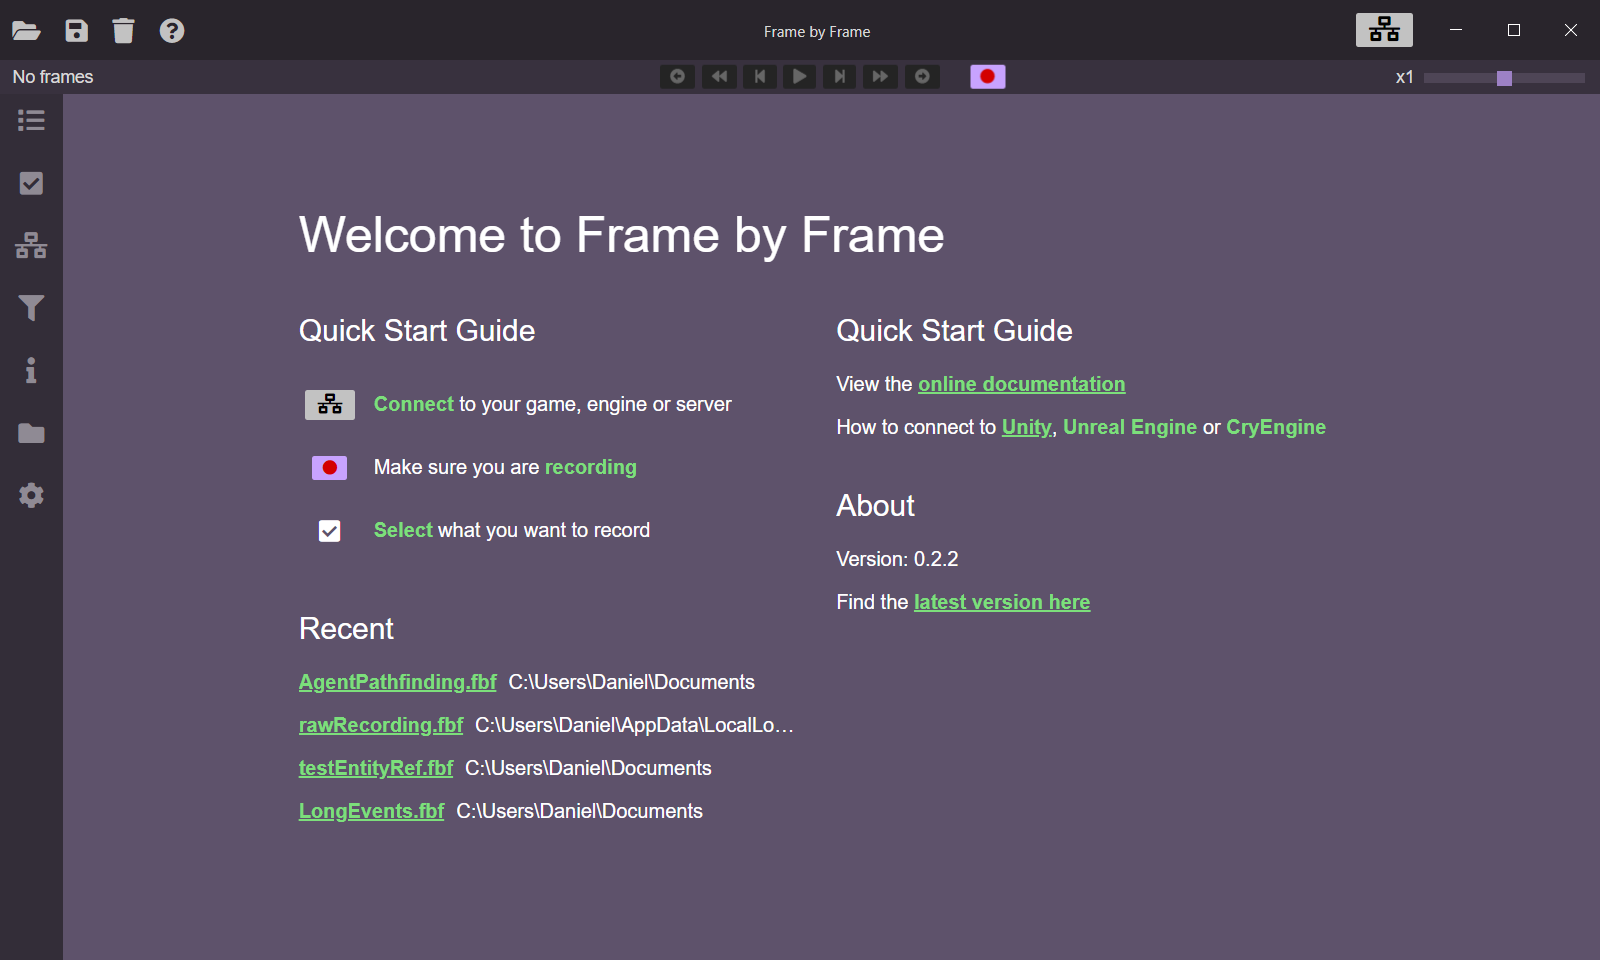
The first thing you will see when running Frame by Frame is the Welcome screen.
The Welcome Screen shows multiple things:
- A quick start guide that explains how to start recording data if you have your engine already integrated with Frame by Frame and running.
- A list with the recent recordings. Click on any of them to open it.
- Links to the documentation page
- Information about Frame by Frame, including the current version
Once you open a recording or start a connection, the welcome screen will disappear.
You can always bring the Welcome Screen back by clicking on the help button in the Title Bar
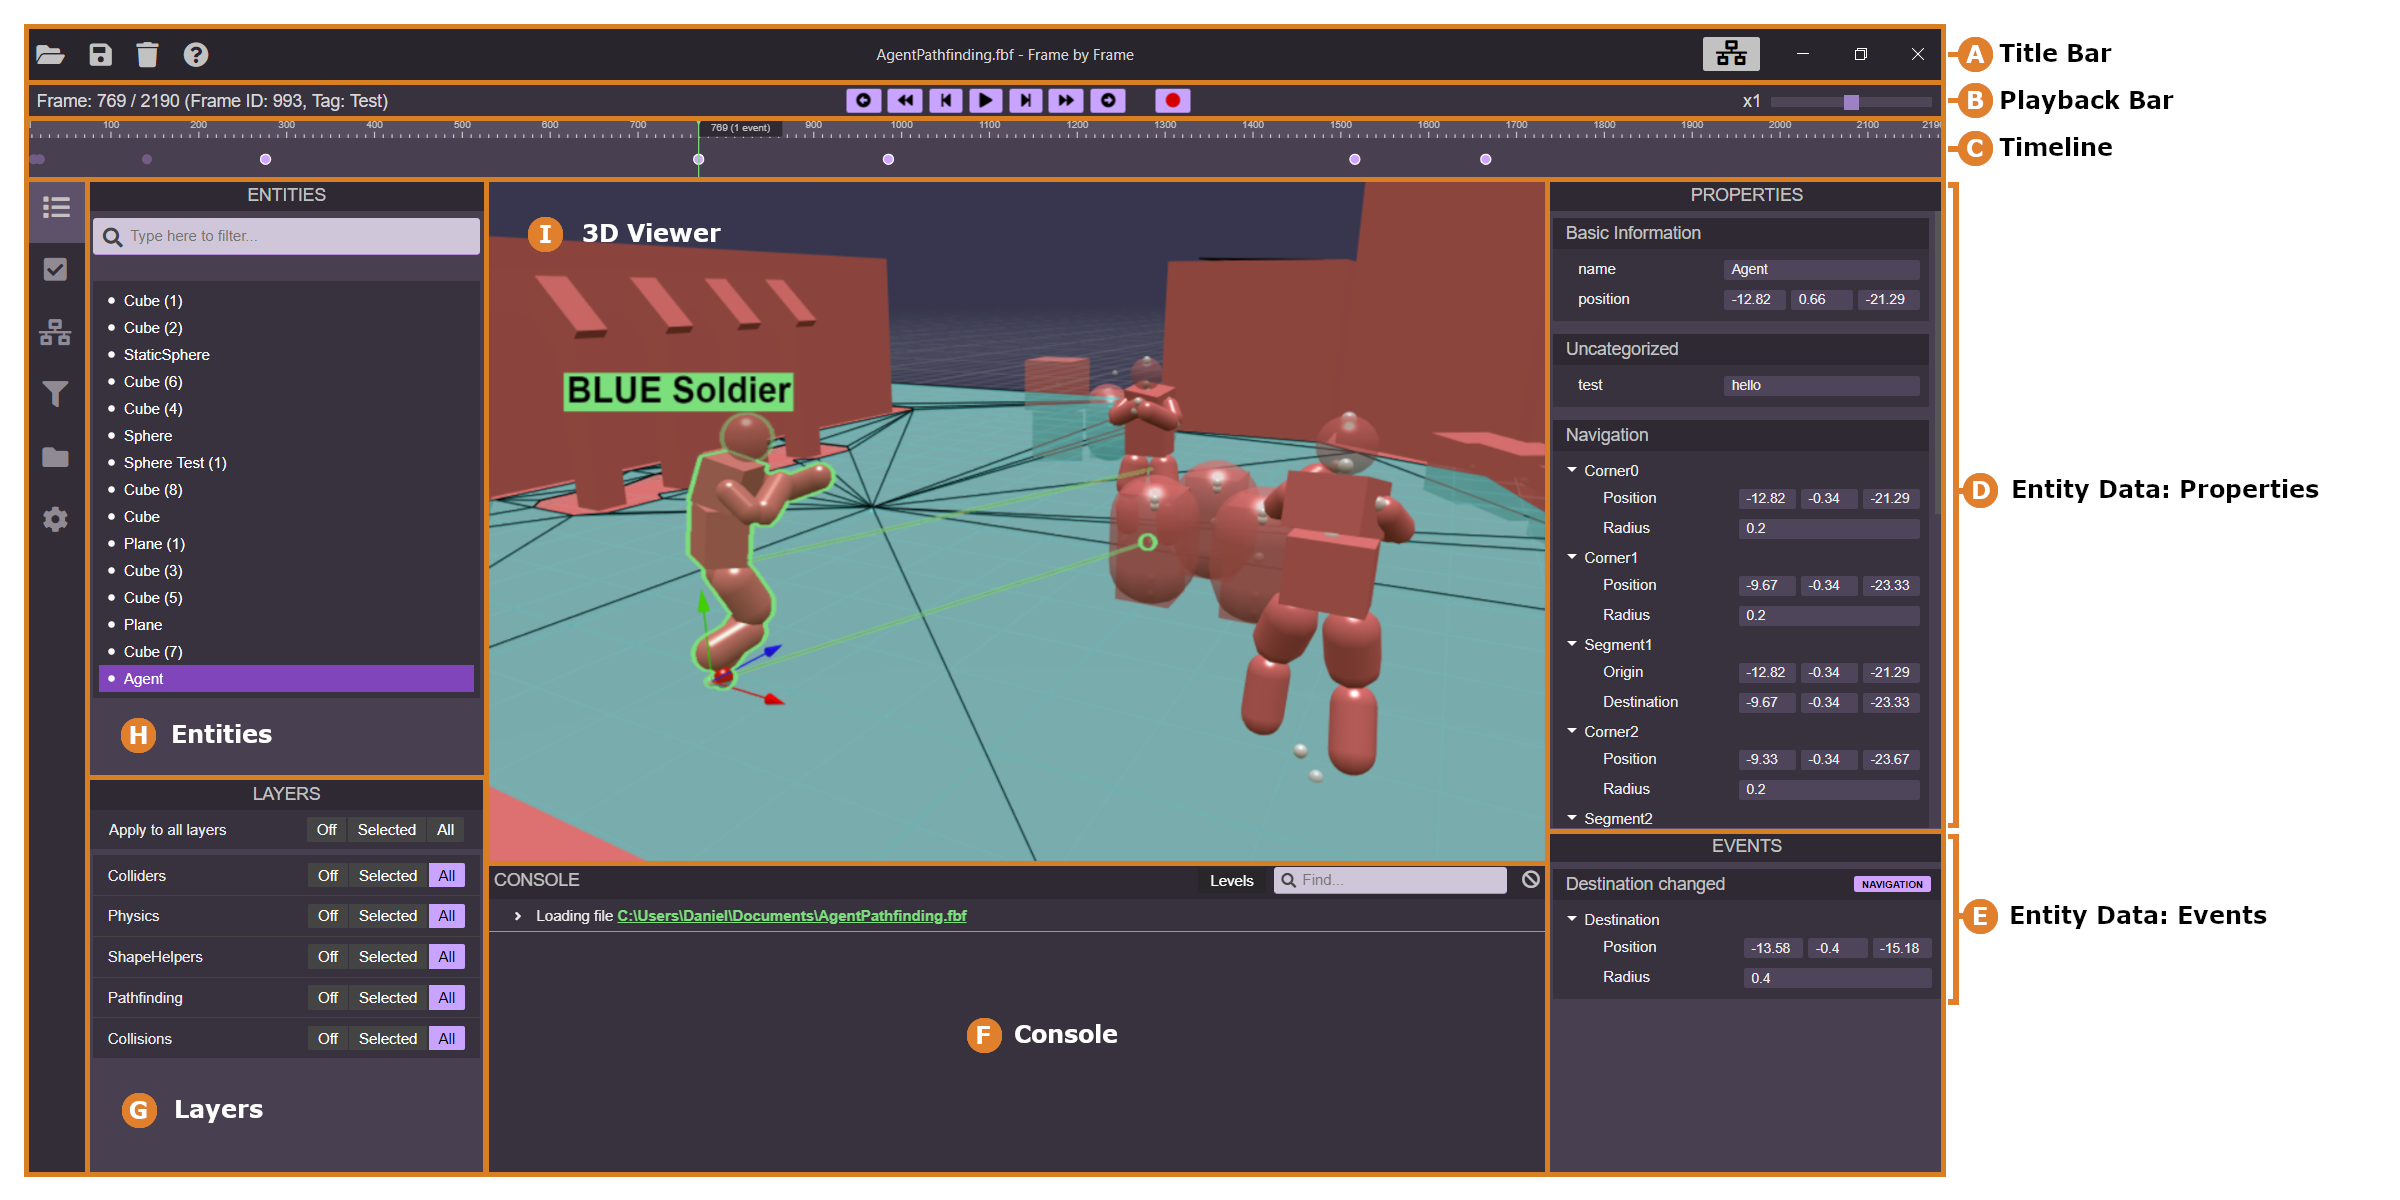
Title Bar
The title bar is at the very top of Frame by Frame. It contains, from left to right:
- Buttons to open a recording, save or remove the current one, and open the Welcome Screen again.
- Title of the current recording
- Quick connection buttons. There is a button per connection. Click on the button to connect/disconnect. By default, a new connection is created to the default port configured in the Settings.
- Buttons to minimize, maximize and close the window.

Playback Bar
The playback bar lets you navigate through a recording. It contains, from left to right:
- Current frame in the recording, plus frame id and client tag. The tag is important if your recording contains data form multiple sources. For example, a multiplayer game where you record the server and a client.
- Playback buttons. They let you navigate through the current recording. With them you can move forward and back, navigate through events or play back the recording, at the same rate as it was recorded. Frame by Frame stores the elapsed time of each frame for this purpose.
- Recording button. Click on it to enable or disable recording without having to disconnect.
- Playback speed bar. Allows you to change the playback speed.

All this operations work on whatever portion of the Timeline is selected. You can learn more on the Timeline Selection section.
Timeline
The timeline lets you quickly navigate through a recording and gives an overview of the recorded data.
The timeline will display the current frame and the amount of frames, as well as the events in the capture. If you have filters, the filtered data will appear instead. Events of the current selected entity will be highlighted.
You can left click on any point of the timeline to go to that frame. Use the mouse wheel to zoom in our out. If you are zoomed in, hold the right mouse button and drag to move.

Timeline Selection
You can select part of the timeline by clicking and dragging on the selection markers on the sides of the timeline.

By selecting only part of the timeline, you can control the portion of the recording that the Playback Bar will use.
You can also select part of the timeline by left clicking while pressing shift on the timeline, and dragging the mouse to the right.
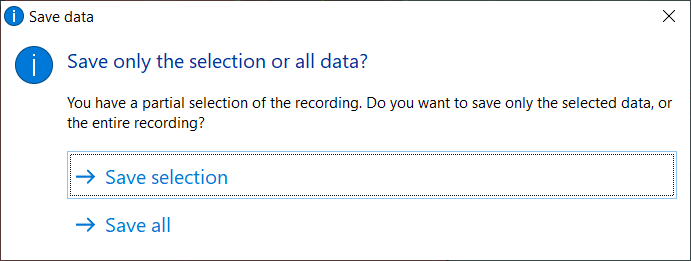
If you have part of the timeline selected and save the recording, a popup window will ask you if you prefer saving the entire recording or only the selection. That way it is possible to crop recordings that contain frames you don’t need.
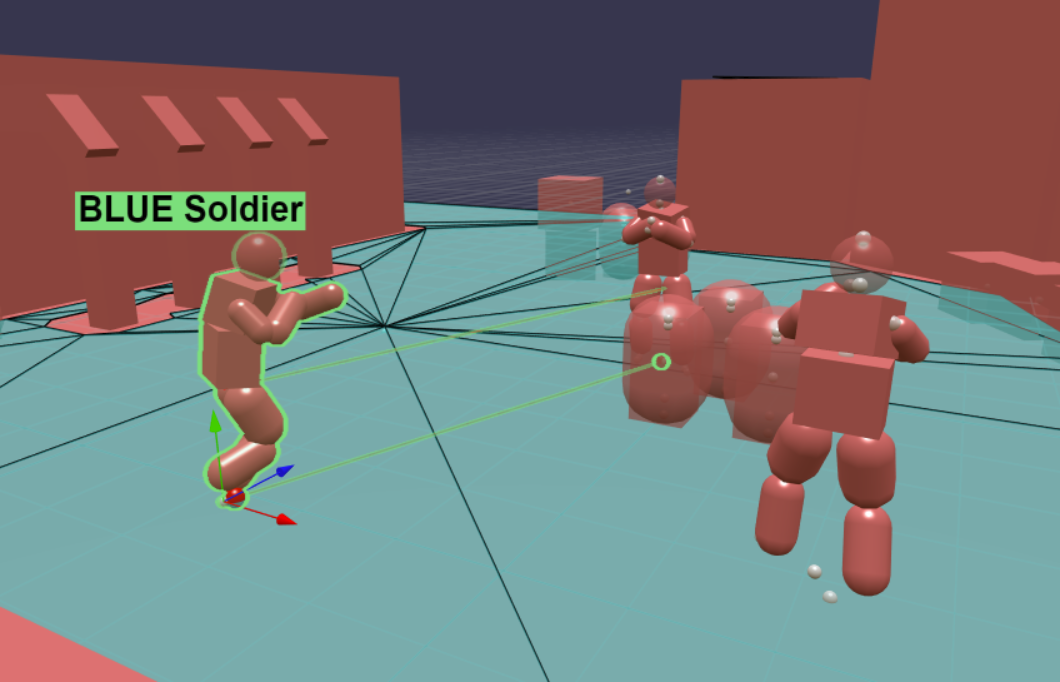
3D viewer
The viewer is one of the central parts of Frame by Frame. It displays the location of the entities, as well as any recorded shapes sent by the game.
Sometimes you only need properties and events when debugging something. However, frequently spacial information is vital to solve bugs or issues. The viewer provides an easy way of displaying any visual data sent by the game/engine.
For example, you could display the colliders of your entities, a line displaying a raycast request and a small sphere in the hit position, or even the entire ragdoll of a character.
You can move around the viewer using the WASD keys and the mouse, similar to the controls of 3D editors of many game engines and tools.
You can hover over any shape, and click on it to select its entity. All recorded data, includinh shapes, belong to an entity. The current selected entity will be highlighted, as well as any attached shapes.
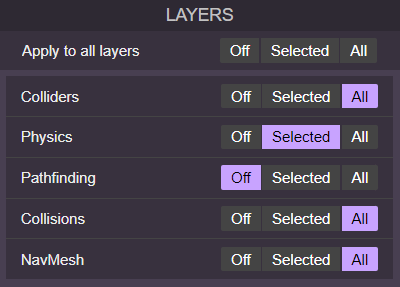
You can control what is visible in the viewer by toggling layers.
When hovering over a shape of a selected entity, the shape will be highlighted, and its name will be displayed on screen. This can be disabled on the settings.
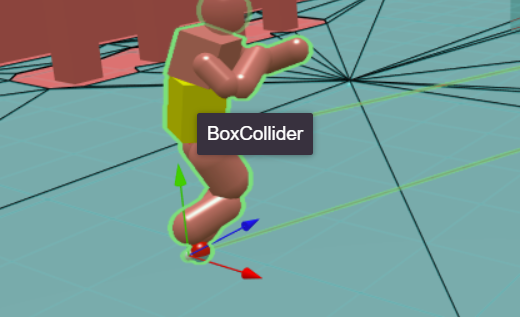
When hovering on a shape in the entity data, a helper line will link its 3D location on the viewer with the property in the UI. The line is meant to help you easily locate the position of a shape on the viewer. This can be disabled on the settings. Note: This only works if the shape is currently being rendered on screen. The shape might not appear due to your current active layers.
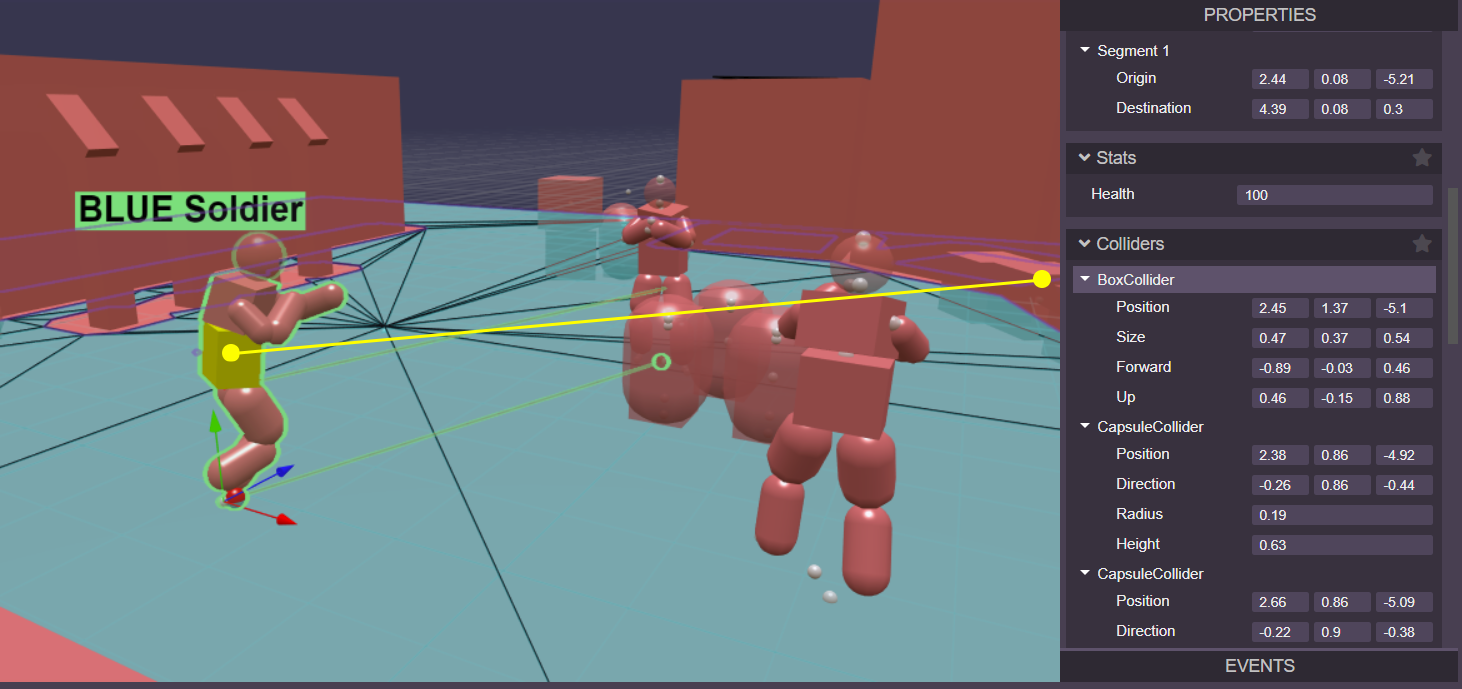
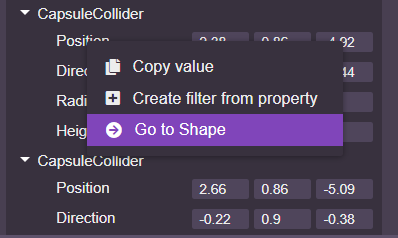
In case you need to quickly go to the 3D location of a shape, you can also right click on the property, and select Go to Shape in the contextm menu. This will move the camera to the position of the shape. Note: This only works if the shape is currently being rendered on screen. The shape might not appear due to your current active layers.
Entity List
In the side bar, the first tab contains the entity list and the layers.
Entities
The Entities section displays all the recorded entities of the current frame.
Click on any entity to select it. The entity data should appear immediatly on the right panel. The entity and all its 3D shapes of the current frame will be highlighted on the viewer. The camera will also move to the entity position, if enabled on the settings.
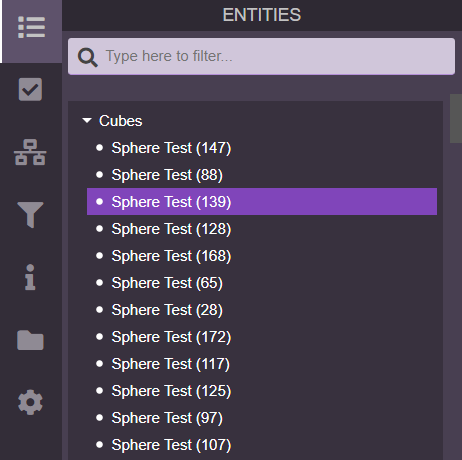
Layers
Layers let you filter what is visible and what is not visible on the viewer. You can select here which layers you want to display. You can decide to show everything inside a layer, just the shapes that belong to the current selection, or nothing.
Entity Data
On the right side of Frame by Frame you can find the entity data. Here you can inspect the information belonging to the currently selected entity. This panel is divided in two parts: Properties and Events.
Properties
Properties are attributes or qualities that belong to an entity, and can change on a frame by frame basis.
Examples of properties are:
- Entity position
- Tags
- Animation state
- Velocity
- Etc.
Properties are always grouped. Properties with the same group will be displayed in Frame by Frame inside a box titled the name of the group.
Properties can also contain groups inside groups.

Events
Events contain information of something that happens at an specific point in time.
Examples of events are:
- Raycast completed
- Pathfinding started
- Damage Received
- Entity Spawned
- Etc.
Events contain properties inside, and can contian groups of properties.
Events also have a tag, that is displayed in the right of the event title bar.
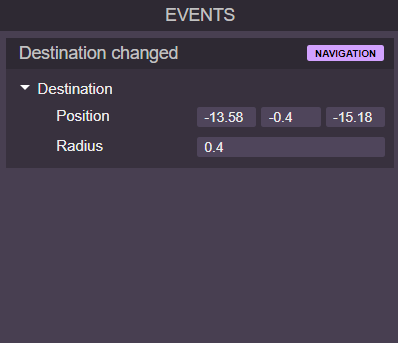
Events also show up in the timeline automatically.
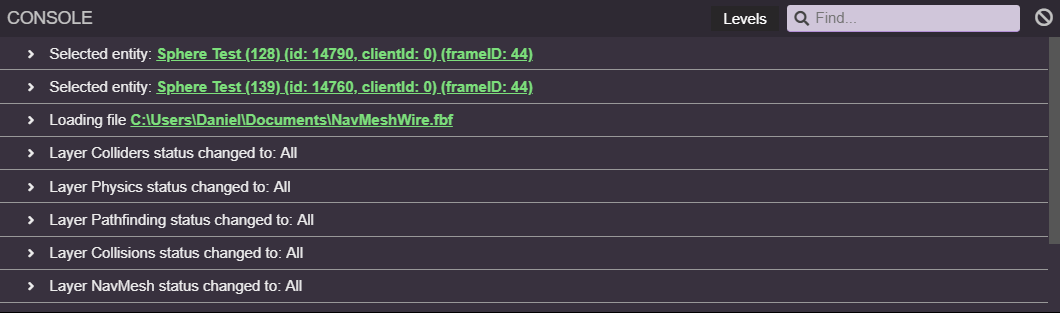
Console
The console is at the bottom.
In the console you can see information regarding your actions. It will log events like opening files, selecting entities, layer changes, as well as general information messages and errors.
You can filter which level of information you want to display by using the “Levels” dropdown menu.
Search in the console by using the search bar at the top right.
Clear all the information in the console clicking on the button on the top rigt, next to the search bar.
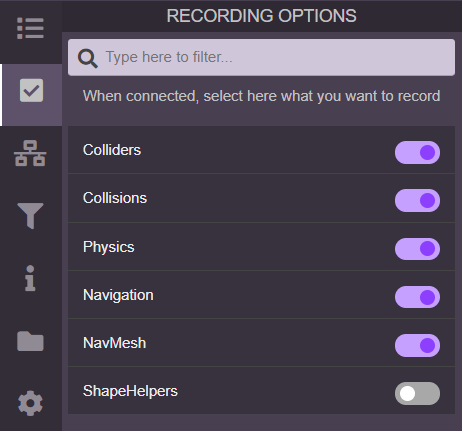
Recording Options
The recording options panel is one of the tabs in the left side bar.
Here you can select what do you want to record, once you are connected to a game/engine.
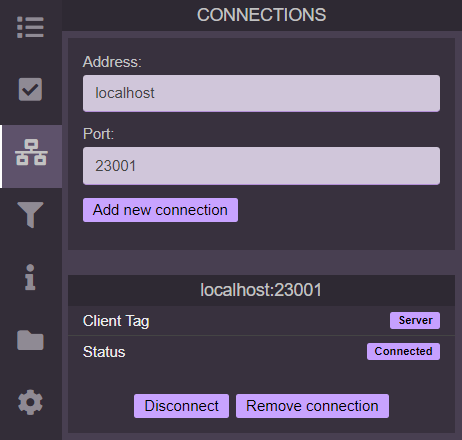
Connections
The connections panel is one of the tabs in the left side bar.
In this panel you can add and remove connections, as well as connect or disconnect the existing ones.
By default, the game creates a new connection to localhost in the default port. You can change the default value in the settings.
Filters
When examining a large recording, sometimes it can be hard to find exactly what we need. Filters can help with that.
A filter will let you display on the timeline properties with specific values, events with certain properties or combination of them.
For example, if we have a recording with many recorded events: collisions, damage, pathfinding requests… If we are interested on damage events where the damage source is something specific, we can create a filter for that. That way we can easily navigate through every event that matches the filter. Or we could filter collisions with an specific collider by name.
Filters have their own section in the left side bar. Here you can add new filters, as well as configuring the filter name and data.

When you create a new filter, a Filter Ticker will apear on the left side of the viewer, showing the name of the filter and its color. You can also click on the eye icon on the ticker to hide or show the filter on the timeline.

The filter color is important. All filters are color-coded. This is useful when having multiple filters, since there will be multiple indicators on the timeline. The indicators will match the filter color. Colors are assigned automatically. The color of a filter can be seen in the filter, the ticker and the timeline indicators.
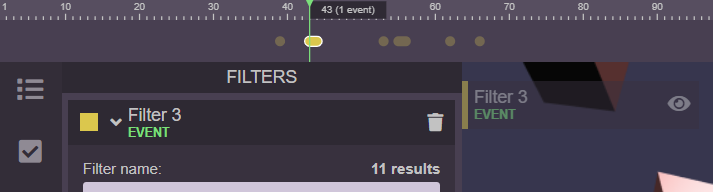
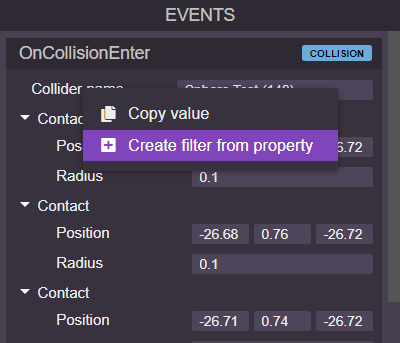
In order to save time, you can right click on any property to create a new filter based on that specific property.
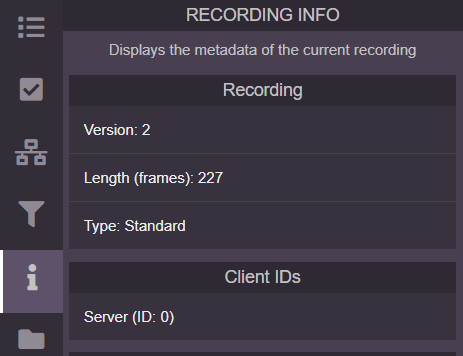
Recording Info
The recording info panel in the left side bar lets you have a quick look at the metadata of the current recording.
The metadata includes information about:
- Version of the recording file
- Length of the recording
- Type of recording
- List of Client IDs
- List of scene/levels
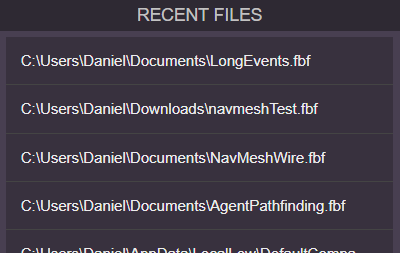
Recent Files
The recent files panel in the left side bar lets you quickly open a recording from the recently opened or saved ones.
Click on any of them to open the recording.
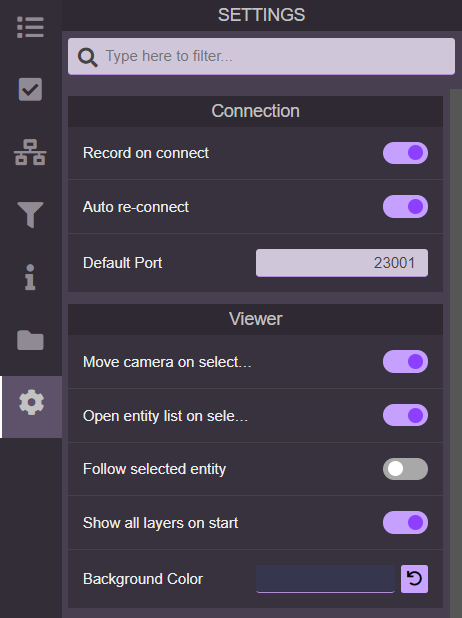
Settings
The settings panel is one of the tabs in the left side bar.
This panel controls all the settings of Frame by Frame. For a detailed list of all settings, please go to the Settings page in the Usage section.